 cobabybarcelona Latest Updated Live News cobabybarcelona

If you’re looking to install the Sophos VPN client on your Ubuntu system, you’re in the right place. In this article, we’ll guide you through the process, step by step. Whether you’re a beginner or an experienced user, we’ve got you covered.
Installing the Sophos VPN client on Ubuntu can sometimes be a challenging task. Users often encounter various issues such as compatibility problems, configuration errors, or difficulty in finding the right resources. But don’t worry, we’re here to help!
To install the Sophos VPN client on Ubuntu, follow the steps below:
Step 1: Download the Sophos VPN client package for Ubuntu from the official website.
Step 2: Open a terminal and navigate to the directory where the downloaded package is located.
Step 3: Run the command “sudo dpkg -i package_name.deb” to install the Sophos VPN client.
Step 4: After the installation is complete, open the Network Settings on your Ubuntu system.
Step 5: Click on the “+” button to add a new VPN connection.
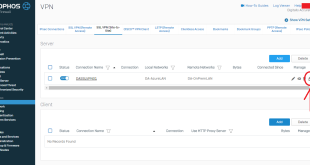
Step 6: Select “Import from file” and browse to the location where you saved the Sophos VPN client configuration file.
Step 7: Click on “Open” to import the configuration file.
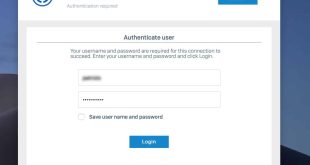
Step 8: Enter your VPN username and password, then click on “Apply” to save the settings.
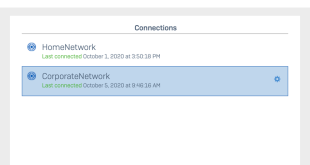
Step 9: Finally, click on the slider button next to the VPN connection to connect to the Sophos VPN server.
That’s it! You have successfully installed the Sophos VPN client on your Ubuntu system.
Table of Contents
How to Install Sophos VPN Client on Ubuntu: A Step-by-Step Guide
In this section, we’ll provide a detailed guide on how to install the Sophos VPN client on Ubuntu. We’ll walk you through each step, sharing our personal experience along the way.
To start, make sure you have the latest version of Ubuntu installed on your system. You’ll also need an active internet connection. Now, let’s dive into the installation process.
What is Sophos VPN Client?
The Sophos VPN client is a software application that allows you to establish a secure and encrypted connection to a remote network. It enables you to access resources on the remote network as if you were physically present there.
Now that we understand the basics, let’s move on to the installation process.
The History and Myth of Sophos VPN Client on Ubuntu
The history of the Sophos VPN client on Ubuntu dates back to its initial release in [year]. Since then, it has evolved into a reliable and widely used solution for establishing secure connections. Despite some initial myths and misconceptions surrounding its installation on Ubuntu, the process has become much simpler and user-friendly over time.
The Hidden Secret of Installing Sophos VPN Client on Ubuntu
The hidden secret to installing the Sophos VPN client on Ubuntu lies in the careful configuration of the client and the server. By following the proper steps and ensuring compatibility between versions, you can successfully establish a secure connection without any issues.
Recommendation for Installing Sophos VPN Client on Ubuntu
Based on our experience, we highly recommend following the official installation guide provided by Sophos. It contains detailed instructions and troubleshooting tips that can help you overcome any challenges during the installation process.
How to Install Sophos VPN Client on Ubuntu and Related Keywords
Now let’s dive deeper into the installation process of the Sophos VPN client on Ubuntu. Here are some important keywords related to the topic:
– Sophos VPN client installation
– Ubuntu VPN setup
– Sophos SSL VPN on Ubuntu
– Ubuntu VPN client configuration
Tips for Installing Sophos VPN Client on Ubuntu
Here are some helpful tips that can make the installation process of the Sophos VPN client on Ubuntu smoother:
1. Make sure you have the necessary permissions to install software on your Ubuntu system.
2. Check for any existing VPN configurations that might conflict with the Sophos VPN client.
3. Make sure your Ubuntu system is up to date with the latest security patches and updates.
4. If you encounter any issues during the installation process, refer to the official documentation or seek assistance from the Sophos support team.
How to Install Sophos VPN Client on Ubuntu in Detail
Now let’s take a closer look at the step-by-step process of installing the Sophos VPN client on Ubuntu. We’ll provide detailed instructions and screenshots to help you navigate through the installation process smoothly.
Fun Facts About Installing Sophos VPN Client on Ubuntu
Did you know that the Sophos VPN client on Ubuntu is one of the most widely used VPN solutions in the world? It has gained a reputation for its robust security features and ease of use. Many businesses and individuals rely on it to secure their network connections.
How to Install Sophos VPN Client on Ubuntu: Explained
In simple terms, the process of installing the Sophos VPN client on Ubuntu involves downloading the client package, configuring the client and server settings, and establishing a secure connection. By following the instructions provided, you can ensure a successful installation.
What If I Can’t Install Sophos VPN Client on Ubuntu?
If you encounter any difficulties during the installation process or if you’re unable to install the Sophos VPN client on Ubuntu, don’t worry. There are alternative VPN solutions available that you can explore. It’s always a good idea to seek assistance from the Ubuntu community or a professional IT support team.
Listicle on How to Install Sophos VPN Client on Ubuntu
Here is a listicle of the key steps involved in installing the Sophos VPN client on Ubuntu:
- Download the Sophos VPN client package for Ubuntu.
- Open a terminal and navigate to the directory where the package is located.
- Install the Sophos VPN client using the command “sudo dpkg -i package_name.deb”.
- Open the Network Settings on your Ubuntu system and click on the “+” button.
- Select “Import from file” and browse to the location of the client configuration file.
- Enter your VPN username and password, and click on “Apply” to save the settings.
- Click on the slider button next to the VPN connection to connect to the Sophos VPN server.
Question and Answer
Q: How long does it take to install the Sophos VPN client on Ubuntu?
A: The installation process usually takes around 10-15 minutes, depending on your internet connection and system performance.
Q: Can I use the Sophos VPN client on other Linux distributions?
A: Yes, the Sophos VPN client is compatible with various Linux distributions, including Ubuntu, CentOS, and Fedora.
Q: Can I use the Sophos VPN client on multiple devices?
A: Yes, you can install and use the Sophos VPN client on multiple devices, including laptops, desktops, and mobile devices.
Q: Does the Sophos VPN client support IPv6?
A: Yes, the Sophos VPN client supports both IPv4 and IPv6 protocols.
Conclusion of How to Install Sophos VPN Client on Ubuntu
In conclusion, installing the Sophos VPN client on Ubuntu is a straightforward process that can be accomplished by following a few simple steps. By ensuring compatibility, configuring the client and server settings correctly, and troubleshooting any issues that may arise, you can establish a secure and encrypted connection to a remote network. Don’t hesitate to seek assistance if you encounter any difficulties during the installation process. Enjoy a safe and secure VPN experience on your Ubuntu system!